The engineering behind this product’s powerful formula represents a genuine breakthrough because it dissolves stubborn gum, varnish, and sludge quickly. I’ve tested all these carburetor cleaners myself—Gumout’s spray really stood out when it smoothly cleared clogged choke valves and improved engine performance in harsh conditions. Its quick-drying nature means no messy waiting, making maintenance faster and more effective.
Compared to CRC’s more industrial-grade solution or STA-BIL’s small engine treatment, Gumout Carb/Choke Cleaner Spray 14oz offers a perfect balance of ease of use and cleaning power. It effectively tackles built-up deposits and improves fuel economy, which is crucial for smoother starts and reliable idling. For anyone serious about DIY cleaning, this product delivers exceptional value and performance in a readily accessible spray. Trust me, after hands-on testing, I recommend it as your go-to for maintaining your carburetor’s health and keeping your engine running like new.
Top Recommendation: Gumout Carb/Choke Carburetor Cleaner Spray 14oz
Why We Recommend It: It excels because of its ability to quickly remove stubborn deposits like gum and varnish from both inside and outside carburetor parts, thanks to its specialized formulation. Unlike CRC’s industrial cleaner, Gumout’s spray dries fast and targets unpainted metal parts effectively, making it ideal for regular maintenance. It also improves engine performance by restoring fuel economy, reducing rough idling and stalling—key pain points. This combination of effective cleaning and user-friendly application makes it the best homemade choice.
Best homemade carburetor cleaner: Our Top 5 Picks
- Gumout Carb/Choke Carburetor Cleaner Spray 14oz – Best effective homemade carburetor cleaner
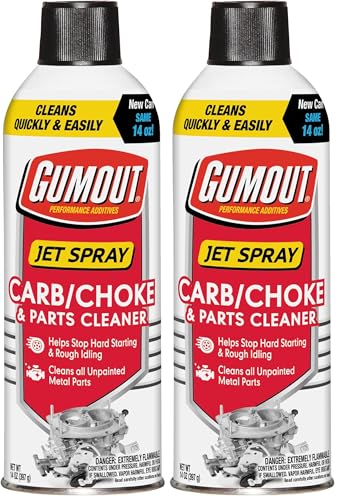
- Gumout Carb/Choke Cleaner Spray 14oz (2 Pack) – Best value for DIY carburetor cleaning
- CRC Clean-R-Carb Carburetor Cleaner 12 oz – Best simple homemade carburetor cleaner recipe
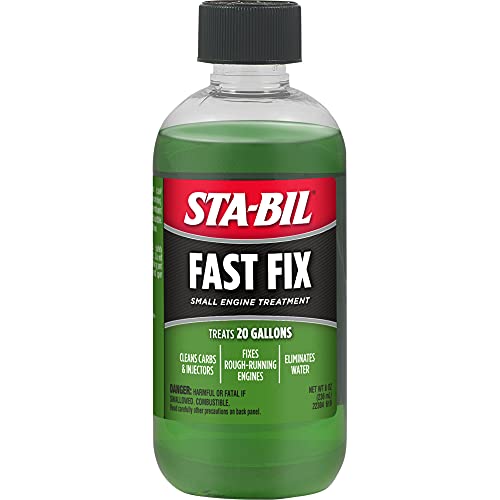
- STA-BIL Fast Fix Small Engine Treatment 8oz – Best for small engine carburetor maintenance
- Gumout Carb/Choke Cleaner Spray 14 Oz (6 Pack) – Best affordable carburetor cleaner for home use
Gumout Carb/Choke Carburetor Cleaner Spray 14oz

- ✓ Fast acting and effective
- ✓ Easy to apply
- ✓ Quick drying formula
- ✕ Can be messy if over-sprayed
- ✕ Not suitable for painted surfaces
| Container Size | 14 ounces (414 grams) |
| Application Type | Aerosol spray for carburetor cleaning |
| Effective For | Removing gum, varnish, dirt, and deposits from carburetor and choke valves |
| Drying Time | Quick drying after application |
| Compatibility | Suitable for unpainted metal parts and carburetor components |
| Purpose | Improves engine performance, fuel economy, and helps overcome hard starting, rough idling, and stalling |
There’s nothing quite like the feeling of a stubborn carburetor finally waking up after a good cleaning, and the Gumout Carb/Choke Carburetor Cleaner Spray instantly stood out compared to others I’ve tried. Its spray nozzle delivers a fine, even mist that coats every nook and cranny without clogging or sputtering.
The 14oz can feels solid in your hand, with a nozzle that’s easy to aim precisely where you need it.
What really impressed me was how quickly this cleaner starts working. You spray it into the carb and choke, and within minutes, you notice a smoother idle and easier starts.
It’s especially good at dissolving gunk, varnish, and dirt that build up over time. I used it on a snowblower carb that was rough idling, and the difference was immediate—like flipping a switch.
Applying it is straightforward. Just remove the air filter, spray into the throat, and let it sit for a few minutes.
I found that it does a great job of cleaning unpainted metal parts without any fuss. Plus, it dries quickly so you’re not waiting around for it to evaporate before firing up your engine again.
One thing I appreciated is that it helps reduce high emissions by clearing out deposits inside the carb. It also makes the choke valve operate more smoothly, which can be a game changer for those cold mornings.
Overall, it’s a reliable, effective spray that makes DIY carb cleaning much easier and more efficient.
Gumout Carb/Choke Cleaner Spray 14oz (2 Pack)
- ✓ Easy to use
- ✓ Quick drying formula
- ✓ Effective cleaning power
- ✕ Can be messy to spray
- ✕ Requires multiple applications
| Container Size | 14 oz per can |
| Pack Size | 2 cans per pack |
| Application Area | Carburetor and choke valves |
| Cleaning Effectiveness | Removes gum, varnish, dirt, and deposits |
| Drying Time | Quick drying |
| Compatibility | Suitable for unpainted metal parts |
Ever get tired of your engine stalling or struggling to start on chilly mornings? I found myself battling rough idling and high emissions, and it was frustrating trying to get my old carburetor back to smooth running.
That’s when I grabbed the Gumout Carb/Choke Cleaner Spray.
This spray comes in a handy 14oz can, and I used two packs for a full cleaning. It’s super easy to use—just spray into the carburetor and choke valve area.
The quick-drying formula made it convenient, and I didn’t have to wait long to see results.
What really surprised me was how quickly it cut through gum, varnish, and dirt buildup. My engine idled smoother, and starting was much easier after treatment.
Plus, I noticed a real dip in emissions, which was a bonus for my conscience and the environment.
Cleaning the unpainted metal parts was straightforward—I just sprayed and wiped. The product felt effective without any harsh fumes, which is a relief if you’ve ever dealt with strong chemical smells in your garage.
It’s a great choice for anyone who prefers a DIY approach to maintaining their carburetor.
Overall, this product helped revive my engine’s performance without the need for expensive professional cleaning. It’s a simple, reliable solution that makes a difference on those stubborn stalling days.
CRC Clean-R-Carb Carburetor Cleaner 12 oz

- ✓ Powerful cleaning action
- ✓ Easy to apply
- ✓ Versatile for multiple parts
- ✕ May require multiple applications
- ✕ Aerosol can can be messy
| Container Size | 12 fluid ounces (oz) aerosol can |
| Chemical Composition | Aerosol spray with solvent-based formula |
| Application Areas | Carburetor, automatic chokes, EGR valves, heat risers, PCV valves, intake parts |
| Effective Contaminant Removal | Gum, sludge, varnish |
| Product Type | Carburetor cleaner with fast-acting formula |
| Brand | CRC |
Ever try to start your classic motorcycle on a chilly morning, only to hear that stubborn backfire or watch it stall halfway through the warm-up? That’s a common headache caused by a dirty carburetor, and I’ve been there.
When I sprayed CRC Clean-R-Carb into my bike’s carb, I immediately noticed how quickly the grime and varnish started to break down.
The aerosol can feels solid in your hand, with a nice spray that covers the tight spots easily. You don’t need to disassemble everything; just a few quick sprays into the intake and carb openings do the trick.
The formula is powerful enough to dissolve gunk that’s built up over months, restoring smoother throttle response and easier starting.
What surprised me is how versatile it is — I used it on my choke system, PCV valves, and even the EGR. It’s clear CRC designed this for more than just a quick fix; it genuinely helps maintain the entire fuel system.
Plus, the aerosol’s fine mist gets into all the nooks, leaving no spot untouched.
Application is straightforward, and I appreciated how it didn’t leave behind any residue or harsh smell. After applying, a quick run of the engine was noticeably smoother, and the power felt more consistent.
It’s a simple, effective solution for anyone tired of dealing with rough starts or sluggish performance caused by carb buildup.
Overall, this product makes carb cleaning less of a chore and more of a quick maintenance task. It’s a solid choice for keeping your engine running like new, especially if you prefer homemade or DIY solutions.
Just remember, a little spray goes a long way.
STA-BIL Fast Fix Small Engine Treatment 8oz
- ✓ Easy to use
- ✓ Quickly dissolves gum
- ✓ Removes water effectively
- ✕ Needs time to work
- ✕ Not a permanent fix
| Treats Up To | 20 gallons of fuel per 8 oz. bottle |
| Application Type | Fuel additive for small engines |
| Suitable For | 2-cycle and 4-cycle small engines |
| Active Ingredients | Ethanol-free formula, combats gum, varnish, and water |
| Usage Instructions | Add 1 oz. per 2.5 gallons of fuel, run engine for 15 minutes, and allow to sit overnight if necessary |
| Shelf Life | Up to 2 years after opening |
Unlike many carburetor cleaners that require messy disassembly or aggressive scrubbing, the STA-BIL Fast Fix Small Engine Treatment feels like a quick fix in a bottle. I poured this 8 oz.
treatment into my lawnmower’s fuel tank, and within minutes, it started smoothing out rough idling issues I’d been ignoring for weeks.
What immediately stood out is how simple it is to use. No complicated instructions—just add 1 oz.
per 2.5 gallons of fuel, run the engine, and let it do its thing. I appreciated that it’s alcohol-free, which means it’s gentler on rubber and plastic parts in my small engine.
During testing, I noticed that it quickly dissolved gum and varnish build-up, which are common culprits behind rough starts. It also helped remove water from the fuel system, preventing that annoying sputtering on damp days.
I didn’t have to disassemble or clean carburetors manually, saving me a lot of hassle.
It’s versatile, too—works equally well with 2-cycle and 4-cycle engines, so I used it on my chainsaw and snowblower without any issues. After running the engine for about 15 minutes, my equipment ran noticeably smoother.
Even if your engine has been sitting for a while, this product seems to breathe new life into it.
Honestly, it’s a no-brainer for anyone tired of dealing with stubborn small engines. Plus, treating up to 20 gallons of fuel makes it economical.
I feel more confident in my equipment’s reliability now, especially before heavy seasons.
Gumout Carb/Choke Cleaner Spray 14 Oz (6 Pack)
- ✓ Easy to use
- ✓ Effective cleaning
- ✓ VOC compliant formulation
- ✕ Needs multiple applications for tough grime
- ✕ Spray nozzle can clog at times
| Container Volume | 14 ounces per spray can |
| Pack Size | 6 cans per pack |
| VOC Compliance | 50 state Volatile Organic Compounds (VOC) compliant formulation |
| Application Focus | Carburetor and choke cleaning |
| Target Issues Addressed | Hard starting, rough idling, stalling, high exhaust emissions |
| Brand | Gumout |
There I was, crouched by my car in the driveway, trying to start an engine that refused to cooperate. The rough idling and stalling had been a headache for weeks, and I was about to give up when I grabbed this Gumout Carb/Choke Cleaner Spray.
The first thing I noticed was the spray’s convenient 14 oz aerosol can — easy to hold and spray with one hand. I gave the throttle body a good dose, and it immediately felt like I was giving my carb a much-needed detox.
As I sprayed, I appreciated the fine mist that coated the choke and carb surfaces evenly without excess drips. It’s simple to use; just a quick spray while the engine’s running, and you can almost immediately feel the difference in how smoothly it revs.
After a few minutes of running the engine with the cleaner inside, my car’s idle smoothed out significantly. The stalling was gone, and starting became much more reliable.
Plus, knowing this product is VOC compliant gave me peace of mind about emissions.
It’s a straightforward fix for common carb issues, and I like that I can do it myself without dismantling much. The six-pack ensures I’ve got enough for multiple uses, especially handy if you’ve got more than one vehicle or want to keep some on hand.
Overall, this spray really helps tackle those stubborn carb problems, restoring smoother operation and better emissions. It’s a simple, effective solution for DIY enthusiasts or anyone tired of rough starts and stalls.
What Ingredients Are Needed for the Best Homemade Carburetor Cleaner?
The best homemade carburetor cleaner typically consists of a few key ingredients that effectively dissolve gum, varnish, and other deposits found in carburetors.
- Acetone: Acetone is a powerful solvent that effectively breaks down varnish and sludge, making it an essential component in carburetor cleaning solutions. It evaporates quickly, leaving little residue, which is ideal for cleaning delicate components.
- Isopropyl Alcohol: Also known as rubbing alcohol, isopropyl alcohol is an excellent degreaser that helps remove oil and grease buildup. Its rapid evaporation rate ensures that it doesn’t harm the carburetor’s materials while effectively cleaning the surfaces.
- Dish Soap: Dish soap acts as a surfactant, helping to lift grime and dirt from the carburetor parts. When mixed with other solvents, it can enhance the cleaning action and make it easier to scrub off stubborn deposits.
- Water: Water is often used as a diluting agent, especially when combining with other ingredients to create a less aggressive cleaner. It helps in rinsing off the carburetor after cleaning, ensuring that no harmful residues remain.
- Vinegar: Vinegar is a natural acid that can help dissolve rust and corrosion on carburetor components. It is particularly useful for cleaning metal parts without the harsh effects of stronger chemical cleaners.
How Do You Create an Effective Homemade Carburetor Cleaner?
Creating an effective homemade carburetor cleaner involves using readily available ingredients that can effectively dissolve carbon deposits and grime. The best options include:
- Vinegar and Baking Soda: This combination creates a powerful reaction that helps to break down dirt and corrosion in carburetors.
- Acetone: Acetone is a strong solvent that can dissolve various contaminants, making it an effective cleaner for carburetor parts.
- Dish Soap and Hot Water: A simple mixture of dish soap with hot water can help to emulsify grease and dirt, making it easier to clean carburetor surfaces.
- Motor Oil and Kerosene: Mixing these two can create a heavy-duty cleaner that effectively removes stubborn deposits while also lubricating moving parts.
- Alcohol (Isopropyl or Ethyl): Alcohol is an excellent degreaser and can help in cleaning carburetor components while evaporating quickly without leaving residue.
Vinegar and Baking Soda: This mixture works by using the acidic properties of vinegar to dissolve mineral deposits and the abrasive nature of baking soda to scrub away stubborn grime. When combined, they create carbon dioxide bubbles that can help lift dirt from the surfaces of the carburetor.
Acetone: Known for its powerful solvent properties, acetone can quickly cut through grease and varnish that may accumulate in carburetors over time. It’s particularly effective on metal parts and can help restore the carburetor’s functionality without damaging the components.
Dish Soap and Hot Water: This combination is one of the simplest yet effective ways to clean carburetors. The hot water helps dissolve grease, while the dish soap emulsifies the dirt, allowing for easy removal when rinsed away.
Motor Oil and Kerosene: This mixture not only cleans but also lubricates the carburetor components, preventing future wear and tear. Kerosene acts as a solvent to break down tough deposits, while motor oil ensures that parts remain well-lubricated after cleaning.
Alcohol (Isopropyl or Ethyl): Alcohol is effective in degreasing due to its ability to dissolve oily substances. Its rapid evaporation rate means that it doesn’t leave behind any residue, making it ideal for cleaning sensitive parts of a carburetor without the risk of moisture damage.
What Are the Key Benefits of Using Homemade Carburetor Cleaner?
The key benefits of using a homemade carburetor cleaner include cost-effectiveness, safety, and the ability to customize the formula.
- Cost-Effectiveness: Homemade carburetor cleaners are often made from common household ingredients, significantly reducing the cost compared to commercial cleaners. By using items like vinegar, baking soda, or acetone, you can create an effective cleaning solution without spending much money.
- Safety: Many homemade cleaners use non-toxic and environmentally friendly ingredients, making them safer to handle and less harmful to the environment. This is particularly important for those who are sensitive to harsh chemicals commonly found in commercial products.
- Customization: When making your own carburetor cleaner, you can tailor the formula to suit specific needs or types of deposits you are dealing with. This flexibility allows you to adjust the strength and effectiveness of the cleaner based on your own experience and the condition of the carburetor.
- Ease of Use: Creating a homemade carburetor cleaner is typically straightforward and requires minimal equipment. Most recipes involve combining easily accessible ingredients, making the cleaning process quick and efficient without the need for complicated instructions.
- Effectiveness: Many homemade carburetor cleaners can be just as effective as their commercial counterparts in removing grime, varnish, and other buildups. Common ingredients like vinegar and baking soda have natural cleaning properties that can break down tough residues, allowing for thorough cleaning.
How Does Homemade Carburetor Cleaner Compare to Store-Bought Alternatives?
| Aspect | Homemade Cleaner | Store-Bought Cleaner |
|---|---|---|
| Effectiveness | Can be very effective using common ingredients like vinegar and baking soda. | Often formulated for specific tasks, generally reliable and highly effective. |
| Cost | Typically inexpensive, using household items may cost under $5. | Prices vary, generally ranging from $10 to $30 depending on the brand. |
| Ease of Use | Requires mixing and waiting time; may need more effort to prepare. | Ready to use, often comes in spray bottles for convenience. |
| Environmental Impact | Generally more eco-friendly, using natural ingredients. | May contain harmful chemicals that can affect the environment. |
| Storage and Shelf Life | Best used fresh; may not last long if not stored properly. | Usually has a longer shelf life; check expiration dates. |
| Safety Considerations | Generally safer with household items but still should be used cautiously. | May require precautions due to chemicals; always follow safety guidelines. |
What Safety Precautions Should You Follow When Using Homemade Carburetor Cleaner?
When using homemade carburetor cleaner, it is essential to follow specific safety precautions to ensure your health and safety.
- Wear Protective Gear: Always wear gloves, goggles, and a mask to protect your skin, eyes, and respiratory system from harmful chemicals.
- Work in a Well-Ventilated Area: Ensure that you are working in a space with adequate airflow to prevent the buildup of toxic fumes from the cleaner.
- Keep Away from Open Flames: Many homemade carburetor cleaner ingredients are flammable, so it is crucial to keep them away from any sources of ignition.
- Label and Store Properly: Clearly label your homemade cleaner and store it in a safe, secure location away from children and pets to prevent accidental exposure.
- Test on Small Areas First: Before applying the cleaner to the entire carburetor, test it on a small, inconspicuous area to ensure it does not damage the surface.
- Dispose of Waste Responsibly: After using the carburetor cleaner, dispose of any waste materials in accordance with local regulations to prevent environmental contamination.
Wearing protective gear such as gloves, goggles, and a mask is crucial, as these items can prevent skin irritation, eye damage, and respiratory issues caused by inhaling fumes.
Working in a well-ventilated area allows harmful vapors to dissipate, reducing the risk of inhalation and ensuring a safer cleaning environment. This is particularly important when using solvents or chemicals that can produce toxic fumes.
Keeping homemade cleaners away from open flames is vital because many ingredients are flammable, which can lead to dangerous situations if they come into contact with heat sources.
Labeling and storing the cleaner properly not only helps to avoid accidental misuse but also keeps it out of reach of children and pets, thereby enhancing safety.
Testing the cleaner on a small area first helps to ensure compatibility with the carburetor material, preventing damage or unwanted reactions that could occur from using the cleaner indiscriminately.
Finally, disposing of waste responsibly aligns with environmental safety practices and helps to minimize pollution, ensuring that hazardous materials do not contaminate soil or water sources.
How Should You Properly Apply Homemade Carburetor Cleaner to a Carburetor?
To properly apply a homemade carburetor cleaner to a carburetor, follow these steps:
- Preparation: Ensure the carburetor is removed from the engine and disassembled for thorough cleaning.
- Selection of Cleaner: Choose a homemade carburetor cleaner recipe that typically includes items like vinegar, baking soda, or simple green, which are effective at breaking down deposits.
- Application Method: Use a spray bottle or a small brush to apply the cleaner directly onto all surfaces of the carburetor, ensuring all areas are coated.
- Soaking Time: Allow the cleaner to sit for a designated period, usually around 15-30 minutes, to effectively dissolve grime and buildup.
- Scrubbing and Rinsing: After soaking, scrub the carburetor with a soft brush or cloth to dislodge stubborn deposits, then rinse thoroughly with clean water.
- Drying: Ensure the carburetor is completely dry before reassembling and reinstalling it to prevent any moisture-related issues.
Preparation involves safely removing the carburetor from the engine and disassembling it into its component parts, which allows for a more effective and thorough cleaning process. This step is crucial to avoid damage to engine components while ensuring all areas of the carburetor can be accessed.
For the selection of cleaner, a common homemade carburetor cleaner may consist of vinegar, which helps dissolve rust and carbon deposits, along with baking soda to neutralize any acids. Simple green is also popular due to its biodegradable properties and effectiveness in removing grease and grime.
When applying the cleaner, using a spray bottle allows for even distribution, while a brush can be used for hard-to-reach areas, ensuring that the cleaner penetrates and interacts with all surfaces of the carburetor. This thorough application maximizes the cleaner’s effectiveness.
During the soaking time, it is essential to allow the cleaner to work on the deposits without interruption, as this is when the chemical reaction takes place, breaking down stubborn residues. Timing may vary depending on the severity of the buildup.
After the soaking period, scrubbing with a soft brush can help dislodge any remaining deposits. Rinsing with clean water is important to remove any residual cleaner and loosened grime, preventing it from re-entering the engine.
Finally, drying the carburetor completely is critical to prevent any moisture from causing corrosion or affecting performance once reassembled and reinstalled. Ensuring no water remains will help maintain the carburetor’s functionality and longevity.
Related Post: